
USB Charger for Mazda MX-5 Miata NA/NB Installation Guide
This guide will take you step by step to installing an Amber Layer USB Charger for NA/NB Mazda MX-5 Miata whether you have EU, US, JP, or any other model.
Getting to the plastic trim that is to be replaced by the USB charger (NB):
Step 1. Remove the center console of the car, there are 2 Philips head screws in the front of it on the sides, and one or two screws behind the armrest lid. The shift knob has to be removed as well, it can be done by twisting it counter-clockwise. There is a window switch connector that must be disconnected to remove the center console fully, but it is unnecessary since it can be put to the side.
Step 2. Remove the front console surround trim by carefully pulling on it all around starting from the bottom. It is recommended to use plastic interior disassembly tools due to this trim being fragile.
Step 3. Unplug any plugs that go to the accessories mounted in the surround trim.
Getting to the blank plate/cigarette lighter to be replaced by the USB charger (NA):
Step 1. Take a Philips head screwdriver and remove 2 screws holding a trim under the steering wheel by the driver’s legs.
Step 2. Remove the trim.
Step 3. Push out the blank plate/cigarette lighter you want to replace with the USB charger.
Step 4. Unplug the connector.
Installing the USB charger (NA/NB):
Step 1. EU version with the blank. Pry on the clips, holding the blank piece in place, and push it to the outside.
Step 2. Insert your new USB charger and push it in until it clicks into place.
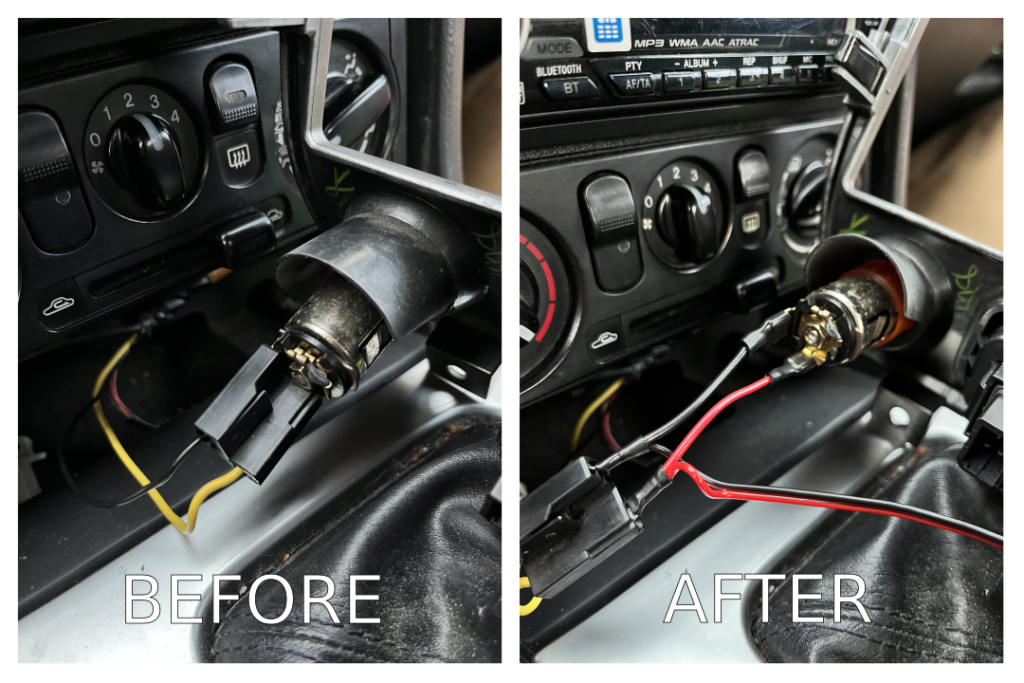
Step 3. (NA/NB IDENTICAL) Disconnect the cigarette lighter plug. Plug the USB charger harness male ends into the cigarette lighter female plug and the female ends of the USB charger harness into the cigarette lighter itself. Please see the reference picture below.
Step 4. Assemble everything back the same way it was disassembled. Enjoy!
